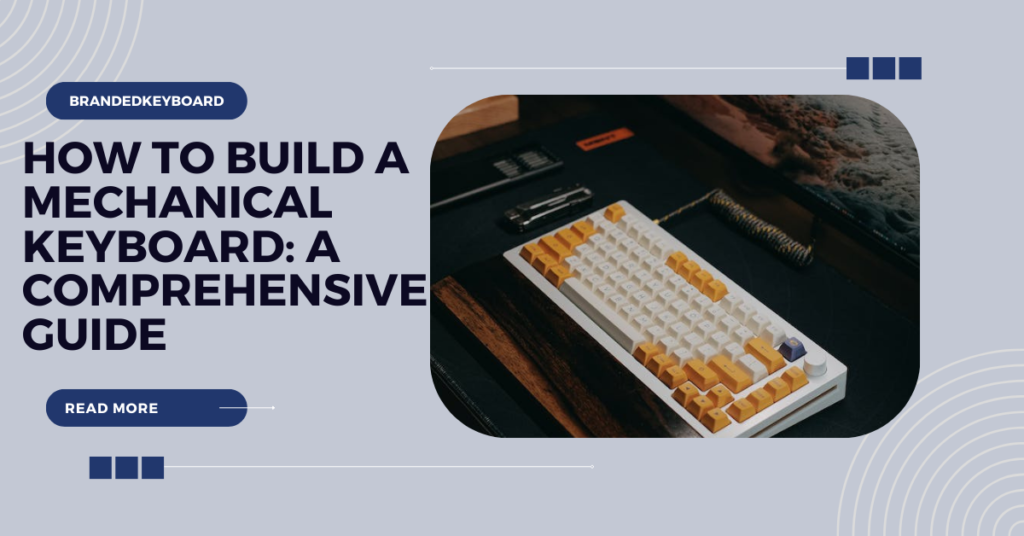
Mechanical keyboards have surged in popularity due to their distinct advantages over traditional membrane keyboards. They offer a tactile and responsive typing experience, which many users find more comfortable and precise. The individual switches beneath each keycap provide a unique sensation upon actuation, allowing for faster and more accurate typing. If you’re intrigued by the world of mechanical keyboards and wondering how to build a mechanical keyboard, you’ll discover that the durability of these keyboards is remarkable, often lasting longer than their membrane counterparts.
This rise in popularity has cultivated a vibrant enthusiast community. Enthusiasts appreciate not only the enhanced typing experience but also the ability to customize every aspect of their keyboard. From choosing different switch types to designing unique keycap sets, the community thrives on the personalization possibilities these keyboards offer.
Benefits of DIY Assembly
Building your own mechanical keyboard isn’t just a DIY project; it’s an immersion into understanding the intricate components that constitute these devices. Through gathering, you gain experience in the internal operations of consoles, from the printed circuit board (PCB) to the switches, keycaps, and stabilizers. This involved experience cultivates a more profound appreciation for the innovation and craftsmanship behind these gadgets. If you’re curious about delving into this rewarding process and wondering how to build a mechanical keyboard, it offers not just a personalized typing experience but a journey into the inner workings of a technology that has become a crucial part of our daily lives.
The DIY approach also allows for complete personalization and customization. By selecting each component individually, users can tailor their keyboard to match their preferences in terms of typing feel, aesthetics, and functionality. Whether it’s a silent keyboard for an office environment or a clicky one for gaming, the possibilities are endless.
Roadmap of the Article
This article is structured to guide you through every phase of building a custom mechanical keyboard. It begins with an exploration of the fundamental aspects of mechanical keyboards, progresses through the detailed steps of assembly, programming, and fine-tuning, and concludes with embracing the uniqueness of your creation. Each section is designed to provide comprehensive insights and practical tips to assist both beginners and enthusiasts in crafting their ideal keyboard.
Understanding Mechanical Keyboards
Anatomy of a Mechanical Keyboard
Mechanical keyboards consist of several core components that contribute to their unique functionality and feel. The PCB, or printed circuit board, serves as the backbone, hosting the switches and providing connectivity. Each switch, housed under a keycap, determines the typing experience, varying in actuation force, tactile feedback, and sound. If you’re intrigued by the inner workings of these keyboards and considering how to build a mechanical keyboard, understanding the role and interaction of these components becomes a pivotal part of the immersive experience. Stabilizers, for instance, ensure smooth key movement, especially for larger keys like the spacebar or shift keys, reducing wobbling and ensuring consistency across the keyboard.
These keyboards differ significantly from traditional membrane keyboards, where rubber domes beneath the keys act as the primary mechanism for registering key presses. In contrast, mechanical keyboards offer distinct, individual switches for each key, contributing to their durability and precision.
Switch Types and Characteristics
Switches define the typing experience. There are various switch families, each with its own distinct characteristics. Cherry MX, Gateron, and Kailh are among the most popular. If you’re exploring the world of mechanical keyboards and contemplating how to build a mechanical keyboard, understanding these switches becomes paramount. Tactile switches provide a noticeable bump upon actuation, indicating keypress registration. Clicky switches, besides the tactile feedback, produce an audible click upon activation. Linear switches lack the tactile bump and operate smoothly from top to bottom. Selecting the right switches is a crucial aspect of customizing your typing experience to suit your preferences.
Understanding the actuation force, actuation point, and sound profile of switches helps users select the perfect fit for their typing style and preferences. Actuation force refers to the pressure required to register a keypress, while actuation point is the depth at which the keystroke is recognized.
Considerations Before Building
Purpose plays a vital role in the keyboard’s design. For gaming, switches with quick actuation points might be preferred, while typists might value tactile switches for better feedback. Similarly, programming or office use might necessitate quieter switches to reduce noise.
Ergonomics and layout preferences also heavily influence the build. Some might prefer a compact layout, sacrificing certain keys for a smaller footprint, while others might prioritize a full-sized layout for maximum functionality. Considering these factors before diving into the build ensures a tailored experience.
This foundation helps users make informed decisions when selecting components and designing their custom mechanical keyboard. Understanding these elements lays the groundwork for a personalized and satisfying typing experience.
Preparing for the Build
Gathering Tools and Components
To embark on the keyboard assembly journey and delve into the world of how to build a mechanical keyboard, assembling the necessary tools and components is crucial. Tools such as a soldering iron, screwdrivers (often Phillips and sometimes Hex), tweezers, and a keycap puller facilitate the assembly process. Additionally, having a clean and well-lit workspace ensures precision and ease during assembly. Whether you’re a seasoned DIY enthusiast or a newcomer to keyboard customization, having the right tools at your disposal is the first step towards a successful and satisfying keyboard-building experience.
Components required for the build include the case, PCB, switches, and keycaps. The case, available in various materials like aluminum, plastic, or wood, contributes to the keyboard’s aesthetics and durability. The PCB acts as the foundation, hosting the switches and providing connectivity. Switches, available in different variants like linear, tactile, or clicky, determine the typing feel. Keycaps, made from materials such as ABS or PBT plastic, contribute to both aesthetics and tactile experience.
Case and PCB Selection
Choosing the right case involves considering material preferences, aesthetics, and functionality. Aluminum cases offer durability and a premium feel, while plastic or wood cases might provide unique aesthetics at a lower cost. Compatibility with the selected PCB and layout preferences is essential when choosing a case.
Selecting a PCB that aligns with the desired layout and switch compatibility is crucial. Some PCBs support specific layouts, such as ANSI or ISO, and may have features like hot-swappable sockets or RGB lighting. Ensuring compatibility between the chosen case and PCB layout prevents issues during assembly.
Selecting Switches and Keycaps
Switch selection determines the typing experience, influencing the feel, sound, and actuation of each keystroke. Linear switches offer a smooth keystroke without tactile feedback, while tactile switches provide a noticeable bump upon actuation. Clicky switches offer both tactile feedback and audible click sounds.
Keycap material and profile play a significant role in the keyboard’s aesthetics and feel. ABS and PBT are common keycap materials, each with its own characteristics regarding durability and texture. Keycap profiles, such as OEM, Cherry, or SA, affect the overall typing experience and aesthetics. Ensuring compatibility between the chosen switches and keycaps is vital for a seamless assembly process.
Understanding these components and their compatibility ensures a smoother build process, minimizes compatibility issues, and allows for a more personalized end product.
Step-by-Step Assembly Process
Workspace Setup and Organization
Creating an optimal workspace is essential for a successful assembly. Clearing clutter and ensuring adequate lighting will assist in maintaining focus and precision during the build. Organize tools and components within reach to streamline the assembly process.
Tips such as using a magnetic mat or tray to keep small screws and parts in place and laying out components in order of assembly contribute to an efficient workflow. Additionally, having a clean workspace minimizes the risk of damage to sensitive components.
Installing Stabilizers and Switches
Installing stabilizers, especially for larger keys like the spacebar or shift keys, ensures smooth and consistent key movement. Detailed steps involve securing stabilizers to the PCB and attaching the keycap stabilizers correctly.
Mounting switches onto the PCB requires careful alignment and insertion. Gently pressing each switch onto the designated slot on the PCB, ensuring they are securely placed, guarantees stability and proper electrical connection.
Mounting PCB into the Case
Aligning the PCB within the chosen case is crucial for stability and proper functionality. Ensuring all screw holes on the PCB match those on the case and securely fastening the PCB into place prevents any movement or instability.
Guaranteeing the solidity of the association between the PCB and case not only guarantees the underlying respectability of the console, but in addition influences the composing experience by preventing any undesirable flex or development during use.
Attaching Keycaps
Properly aligning and installing keycaps is the final step in assembly. Keycaps typically have a specific orientation and should be pressed firmly onto the switches, ensuring they are secure and aligned uniformly across the keyboard.
Checking for stability and uniformity across all keys ensures a consistent typing experience. Verifying that all keycaps are properly seated and stable prevents any potential issues during use.
This step-by-step approach ensures a systematic and thorough assembly process, resulting in a fully functional, custom mechanical keyboard tailored to individual preferences.
Programming and Customization
Firmware and Programming Overview
Understanding firmware options like QMK, VIA, or other custom firmware platforms is key to customizing your keyboard’s functionality. These platforms allow users to modify key mappings, create layers, and implement macros or shortcuts.
QMK, a popular firmware, provides an extensive range of customization options, allowing users to define unique key functions and create complex macros. VIA, with its user-friendly interface, simplifies customization for those less familiar with programming.
Key Layouts and Functions
Configuring key mappings and layers allows users to personalize their typing experience. Users can remap keys, assign different functions to keys based on layers, and create shortcuts for frequently used commands.
Advanced programming options enable the creation of intricate macros, automating sequences of keystrokes or commands. This feature is especially beneficial for programmers, gamers, or professionals seeking streamlined workflows.
Troubleshooting and Debugging
Experiencing issues during writing computer programs is normal, yet understanding how to investigate them is fundamental. Identifying and resolving common problems, such as key mapping errors or unresponsive keys, ensures the keyboard functions as intended.
Accessing resources like online forums, communities, or manufacturer documentation aids in troubleshooting complex issues. These platforms often provide solutions, guides, or assistance from experienced users.
Comprehensive knowledge of firmware options and programming capabilities empowers users to fully customize their mechanical keyboard, enhancing functionality and efficiency. Troubleshooting skills ensure a smooth experience and help overcome any potential challenges.
Fine-tuning and Personalization
Adjusting Switch Feel and Sound
Fine-tuning the switches can significantly impact the keyboard’s feel and sound. Lubricating switches with specialized lubricants minimizes friction and enhances smoothness. This process involves disassembling each switch, applying lubricant to specific contact points, and reassembling them.
Moreover, sound dampening methods like installing dampening rings or foam inside the case reduce the sound produced by keystrokes. These modifications contribute to a quieter typing experience, ideal for shared spaces or quieter environments.
Enhancing Aesthetics with Lighting and Accessories
Customizing the keyboard’s aesthetics involves various options. RGB lighting customization allows users to configure lighting effects, colors, and patterns, adding a visual flair to the keyboard. Some PCBs or cases come with built-in RGB lighting support, while others may require additional components.
Artisan keycaps, handcrafted and often uniquely designed, serve as decorative add-ons, enhancing the keyboard’s visual appeal. These keycaps are accessible in different plans, subjects, and materials, permitting clients to add an individual touch to their consoles.
Maintenance and Care Tips
Regular maintenance ensures the keyboard’s optimal performance and longevity. Cleaning routines involving compressed air or soft brushes remove dust and debris from keycaps and switches. Periodic cleaning prevents buildup and ensures smooth keystrokes.
Long-term care involves precautions like avoiding exposure to liquids and extreme temperatures, which could damage the keyboard. Proper storage and usage practices, such as using a keyboard cover when not in use, protect against wear and tear.
Implementing these fine-tuning methods, personalizing aesthetics, and adopting proper maintenance routines prolong the keyboard’s lifespan and preserve its performance, ensuring an enjoyable and long-lasting typing experience.
Conclusion
The journey of crafting your custom mechanical keyboard begins with understanding its components and functionalities. From the intricate anatomy to the careful selection of switches and keycaps and assembling each part meticulously, the process is a testament to craftsmanship and personalization.
The beauty of a custom mechanical keyboard lies in its uniqueness. It’s not just a functional tool but a reflection of personal preferences and creativity. Embrace the individuality of your creation, whether it’s tailored for gaming, programming, or pure aesthetic pleasure.
In the pursuit of further customization or exploring advanced features, a plethora of resources and communities await. Online forums, manufacturer guides, and enthusiast communities offer a wealth of information and support for those seeking to delve deeper into the world of custom keyboards.
In conclusion, crafting a custom mechanical keyboard transcends the mere act of assembly; it’s an expression of personal taste, meticulous attention to detail, and a journey that culminates in a unique, functional work of art. Embrace this journey, explore endless customization possibilities, and enjoy the rewarding experience of using a keyboard crafted to perfection.
Read More: How to Clean Gaming Keyboard: Ensuring Longevity and Peak Performance
FAQs
A detailed breakdown of the essential components and tools required to successfully build your own mechanical keyboard.
Addressing concerns about the difficulty level of constructing a custom mechanical keyboard and providing insights and tips to make the process more accessible for enthusiasts.
Exploring the step-by-step process and techniques involved in the construction of mechanical keyboards, offering insights into the intricate assembly of these precision-crafted input devices.
A comprehensive guide on crafting a keyboard from the ground up, covering the essential steps and considerations for those looking to create a custom keyboard entirely from scratch.
